WordPress, a versatile content management system, empowers millions of websites worldwide. However, it can present unexpected challenges. The “Loopback Request Error” is one such obstacle that can disrupt crucial site functionalities. This guide aims to equip you with the knowledge and strategies to effectively resolve this error and restore your WordPress site to its optimal performance.
Table of Contents
Understanding Loopback Requests
Loopback requests are internal communication attempts made by WordPress. They are a crucial communication channel for WordPress to execute scheduled tasks, manage background processes, and maintain overall site health. A WordPress loopback request error signifies a disruption in WordPress’s ability to communicate with itself, leading to the error message you’re encountering.
Identifying the Error
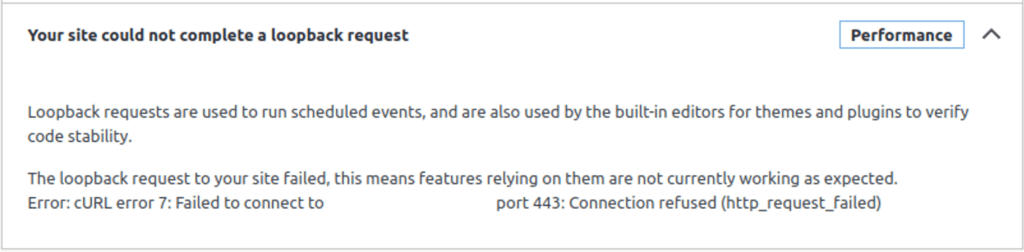
This error often appears on the first page of your WordPress admin dashboard. Alternatively, you can check for it by navigating to Tools > Site Health. If the error exists, you’ll see a message stating, “Your site couldn’t complete a loopback request.”
Significance of Loopback Requests
Loopback requests play a pivotal role in the seamless operation of WordPress websites. These requests are the backbone for executing scheduled events, running background processes, and ensuring the smooth functioning of various critical tasks. With successful loopback requests, WordPress’s ability to manage itself and perform essential tasks is maintained.
Understanding Loopback Request URLs
WordPress dynamically generates the URL for loopback requests based on your site’s specific settings and the configured site URL. It relies on something other than external sources for this information.
The Role of cURL
Loopback requests are facilitated by cURL, a powerful library that enables WordPress to communicate internally. cURL acts as a bridge, allowing WordPress to send and receive data within its system. It’s crucial for executing scheduled events managed through the ‘wp-cron.php’ file, ensuring the timely execution of essential tasks.
Loopback Requests Are Vital
Loopback requests are vital for a multitude of crucial tasks, including:
- Updating content: Keeping your website fresh and up-to-date with the latest information and engaging content.
- Running backups: Safeguarding your valuable data, ensuring a reliable backup in case of unforeseen events or data loss.
- Performing scheduled operations: Automating essential maintenance tasks, such as cleaning the database, optimizing performance, and running security scans.
These tasks rely on cURL-powered loopback requests to ensure seamless communication within the WordPress ecosystem, enabling the timely and efficient execution of site maintenance and management functions.
What is cURL?
cURL, short for “Client for URLs,” is a versatile command-line tool and library for transferring data with URLs. It’s commonly used for making HTTP requests, forming the foundation of many web-based interactions. cURL’s ability to handle various protocols and data formats makes it a powerful tool for developers and system administrators.
Simulating a Loopback Request
To simulate a basic WordPress loopback request using cURL, use this command on the server running your site:
curl -I http://your-wordpress-site.comThis command sends a HEAD request to the WordPress cron file, mimicking a loopback request and providing insights into the communication process. Analyzing the response can reveal potential issues and guide troubleshooting efforts.
Solution
Step 1: Ensure your site address is configured correctly.
To ensure that the site address (URL) is correctly configured in WordPress using the domain example “your-wordpress-site.com”, follow these steps:
- Log in to your WordPress admin panel: Use your administrator credentials to log in to your WordPress dashboard.
- Then, in the admin sidebar, click “Settings” and “General.”
- Review the WordPress address (URL) and site address (URL).
- Ensure Correct Site Address (URL): To confirm that the site address (URL) is set correctly, it should match your actual website’s public URL. It should not include any subdirectory or path that leads to the WordPress installation.
- Make Changes If Necessary: If the site address (URL) is incorrect, update it to match your website’s URL.
- Save Changes: Scroll to the bottom of the page and click the “Save Changes” button to apply the new site address (URL).
Step 2: Add your domain to the Host’s file.
In this step, you must ensure the host file is configured correctly. The Hosts file is essential to enable proper domain resolution. Follow these steps:
1. Log in to your website using SSH with your terminal application, such as PuTTY.
2. Once you are logged in, open the server’s Hosts file by running the command:
nano /etc/hosts3. Add the following line to the end of your Hosts file, replacing “your-wordpress-site.com” with your actual website domain:
127.0.0.1 your-wordpress-site.comThis step ensures that your domain points to the local server, allowing WordPress to perform successful loopback requests within the Docker container.
Note that you do not need to restart.
What about WordPress Docker containers?
To implement this solution, include the –add-host flag in your Docker run command, structured as follows: –add-host yourdomain.com:127.0.0.1, where 127.0.0.1 designates the host IP to which you intend to route yourdomain.com. You may use 127.0.0.1, or in some cases, you may want to use the private IP address of the Docker host.
Here is an example of a Docker run command:
docker run -d \
--name wordpress \
-p 8080:80 \
--add-host your-wordpress-site.com:127.0.0.1
wordpress
Step 3: Test your host configuration with cURL.
Finally, it would be best if you verified that your loopback is working by running the following command:
curl -I http://your-wordpress-site.com
You should be able to see a response similar to this:
HTTP/1.1 301 Moved Permanently
Date: Saturday, October 14, 2023, 23:03:07 GMT
X-Redirect-By: WordPress
Location: https://your-wordpress-site.com/
Content-Type: text/html; charset=UTF-8
If you get a “could not resolve host” message, double check the IP set in the Hosts file.
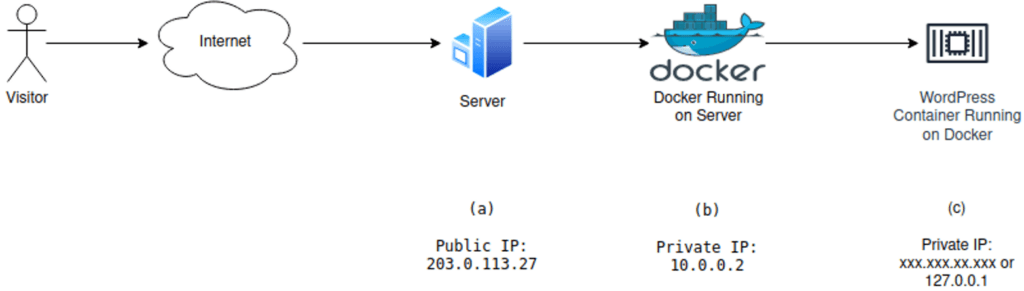
If your Docker setup, for example, is more complex, then you may need to use the private IP address of the Docker host (or (b) in the diagram below). Of course, this diagram is an example only, and you need to determine your IPs based on your setup.
Wrapping Up
The “Your site could not complete a loopback request” error in WordPress can disrupt scheduled tasks, background processes, and crucial operations, hindering your website’s functionality. To restore seamless operation, follow these three key steps:
- Verify Site Address: Ensure your site’s address is correctly configured in WordPress settings.
- Configure Hosts File: Properly configure the Hosts file to ensure accurate domain resolution.
- Test Host Configuration: Use cURL to test your host configuration and identify potential issues.
Consider using private IP addresses in complex Docker setups to resolve the loopback request error. If you encounter challenges, seek support from your hosting provider or the WordPress community. By addressing this error, you’ll ensure your WordPress site runs smoothly and performs all scheduled tasks and operations seamlessly.
Remember, loopback requests are essential for WordPress’s internal communication and task management. Following these steps, you can effectively troubleshoot and resolve the error, keeping your WordPress site running at peak performance.


If you are running WordPress in docker using the docker compose file from https://registry.hub.docker.com/_/wordpress/ there is another reason for getting failed loopback tests:
The container is created with the following port mapping :
ports:
– 8080:80
This means that inside the container WordPress is running on port 80 but that from the outside we access WP on port 8080 via the Docker port mapping. When you connect to docker on port 8080 this is registered during setup as the site address. When docker then runs the loopback tests inside the container it tries to connect to port 8080 where there is nobody listening and thus the test fails.
So the problem can be fixed with using the same port inside and outside the container. For example :
ports:
– 80:80
This worked for me. If you are already using port 80 on the host you can also use 8080:8080. Good luck!