This post will show you how to code a basic AWS EC2 instance dashboard using PHP. The purpose of this dashboard is to show the status of your AWS EC2 instances.
Why do this? Well, it is a great way to learn how to use the AWS API. Plus, it’s “kinda cool” to develop a custom dashboard that controls “dem dev servers” destiny. So let’s code an AWS instance status Dashboard!
Setting up a dashboard won’t take much time. I will demonstrate how you can determine the status of your EC2 instances using PHP. Of course, we also need to secure the API using AWS policies.
The Dashboard uses minimal styling to make it easy to extend or adjust as you please. Implementing additional buttons or actions is easy once you get the basics!
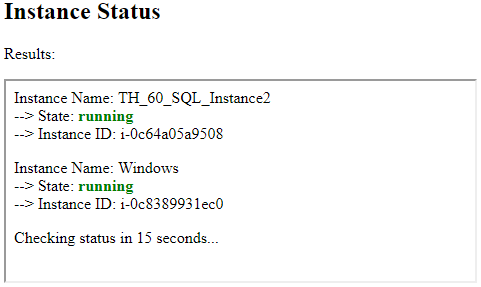
It will look something like this when you are done:
Before we get started…
I assume you already have an AWS account with one or more EC2 instances. If you don’t, then head on over to https://aws.amazon.com/ and sign up for a free account. AWS provides 12 months of free tier access to certain instance types. Visit their free tier details page for more information.
The process
We can set up the dashboard in three steps:
- Step 1 – We create an AWS policy to restrict our access
- Step 2 – We create an AWS API user and assign the policy to the user
- Step 3 – We develop our PHP AWS Instance checker
Table of Contents
Step 1 – Create AWS Policy
An AWS policy is an object that, when associated with a resource, defines its permissions. Thus, the Policy will allow or deny the associated resource-specific actions. For example, we want to use an AWS policy to restrict the activities of our AWS API users.
As an example – The dashboard is only intended to provide the current instance state. There should, therefore, be no reason to allow the API user to create or terminate instances. The idea is to give the least amount of privileges possible. This of the basic principles of the cloud!
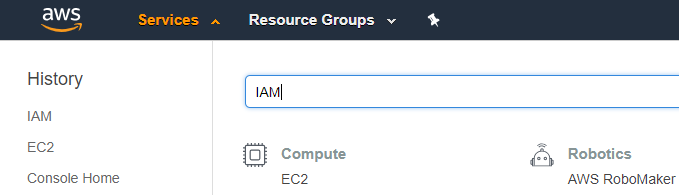
To setup a policy:
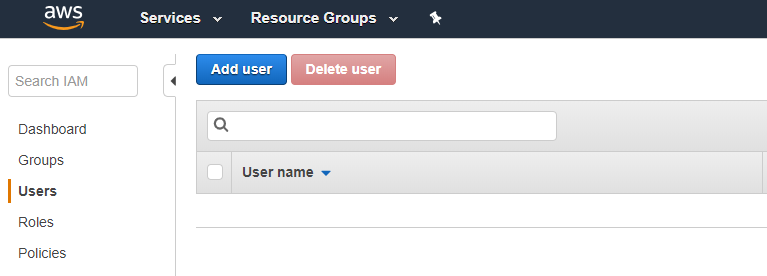
Navigate to the services menu within the AWS Management Console and find ‘IAM’ (or Identity and Access Management).
Click on the ‘policies’ menu item and click on the ‘create policy’ button.
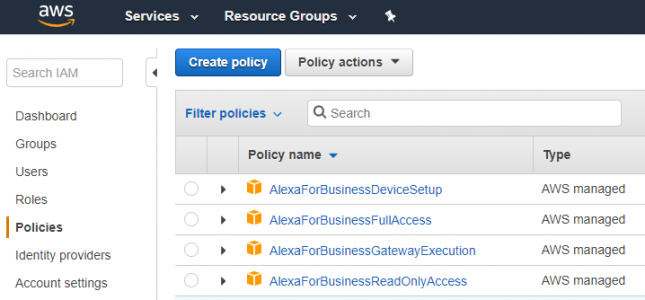
This action will open the ‘create policy’ window.
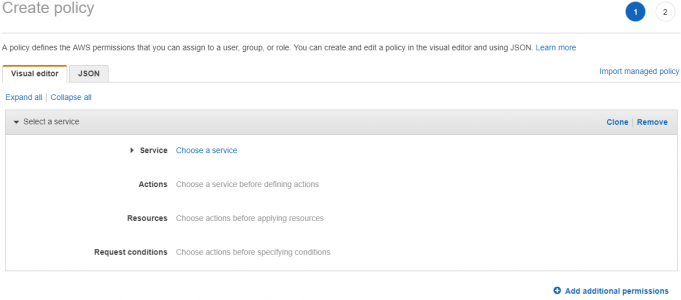
Choose Services
Select ‘choose a service’ and enter ‘ec2’ in the search menu. The service menu will allow you to select the ‘EC2’ service.
Select Actions
Next, you want to search the available actions for the EC2 instances. Search for ‘instances’ and then select: ‘DescribeInstances’, ‘DescribeInstanceStatus’, ‘RebootInstances’, ‘ReportInstanceStatus’, ‘RunInstances’, ‘StartInstances’ and ‘StopInstances’.
Your ‘actions’ settings should look something like this:
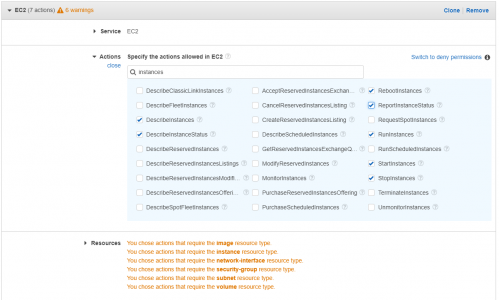
Note that you can reduce or increase the possible actions. The default is
Choose Resources
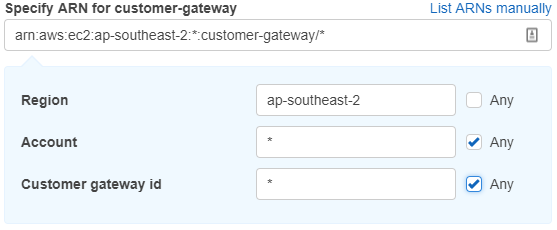
In the next section, we need to specify the policy resources. You have two choices per Resource. You can either define ‘any’ or click on ‘add ARN’.
The ARN (or Amazon Resource Name) is used to identify a specific resource. You can uniquely identify the ARN by specifying the Region that it lives in, the account, and its particular id.
As an example, the setting below matches any ‘customer-gateway’ in the ‘ap-southeast-2’ region. The more specific you are, the better!
I have configured my resources in the following manner:
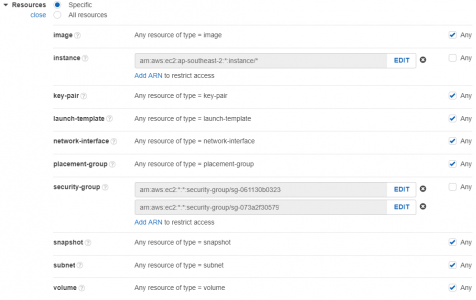
This policy will limit API access to the required resources. Only instances within this specified region and assigned to one of the two security groups will be available.
Click on the ‘review policy button’ and provide the policy with a name, description, and summary review.
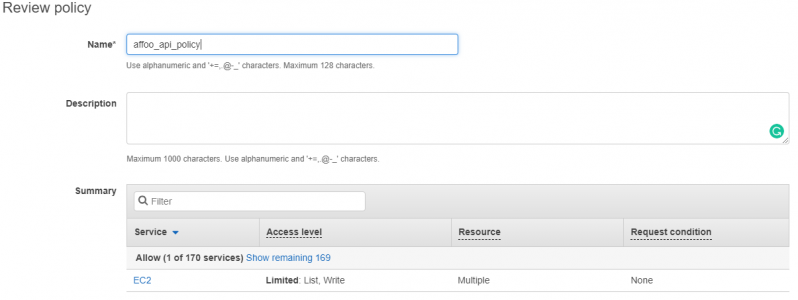
Click on the ‘create policy’ button, and you’re done!
Step 2 – Create an AWS API User
Using the IAM dashboard, click on the ‘users’ menu item and click on the ‘add user’ button.
Provide a user name for the API user.
Enter one and then select ‘programmatic access’. This option will enable an access key ID and secret key that your PHP dashboard can use for API access.

Click on the ‘next: permissions’ button.
The ‘set permissions’ windows allow a couple of options. I suggest adding your user to a group. Groups will make it easier to manage multiple users if needed.

Click on the ‘add users to group’ option and click the ‘create group’ button.
Enter the group name and select the policy you created in step 1.
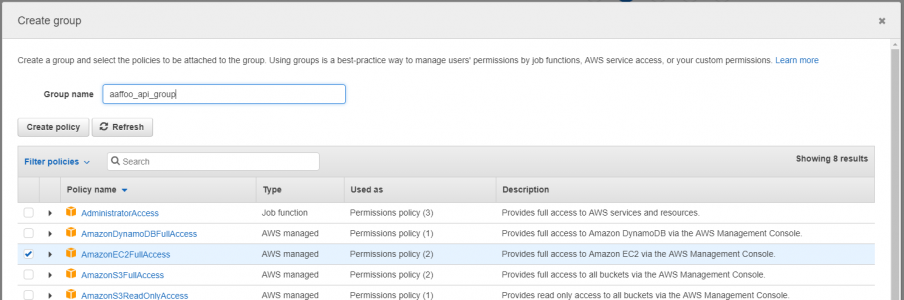
Click on the ‘create group’ button when you are done.
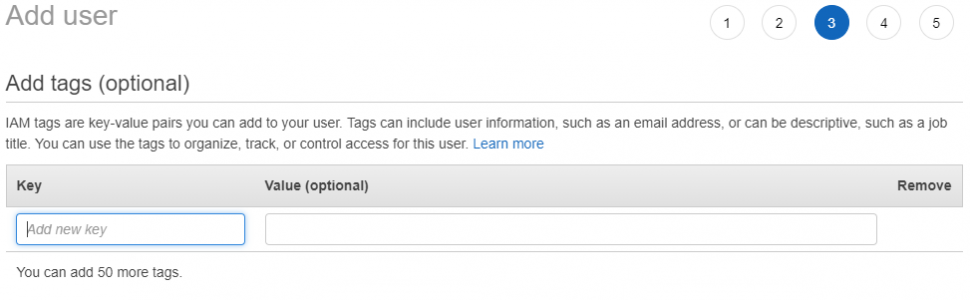
Click on the ‘next: tags’ button. You can add ‘tags’ if you wish or click on the ‘next: review’ button.
You should now see the add user review window. Next, click on the ‘create user’ button.
The final window will show you successfully create the user.

Save the access key ID and the secret access key! Unfortunately, there is no way to retrieve the access key if you forget it. You can only create a new key pair.
Click on the ‘close’ button to complete.
Step 3 – Develop the PHP instance check script
The purpose of the dashboard is to tell us the status of the various AWS EC2 instances. First, of course, you need to ensure that you have some Instances in AWS EC2. They don’t have to be running, but they have one or two to test using the dashboard.
The completed PHP dashboard should look something like this:
This dashboard is primitive, but you can expand it easily by add features such as rebooting instances and more! I did not intend to win any web design awards. Feel free to add some styling and tinsel as you please.
The dashboard requires three pages. Reference the diagram below to see how the pages interact with each other. Note: I have not included in this diagram a reference from status.php to the AWS PHP SDK.
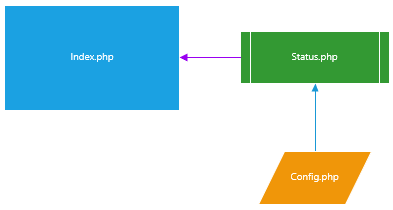
The dashboard has a dependency on the AWS PHP SDK (or Software Development Kit) files. You can either set it as a dependency in Composer, download the SDK, install it as a PHAR (or PHP archive) or download it as a Zip. Visit the getting started page at AWS for more information on this. I downloaded the SDK and added it to a folder called ‘ext_inc’.
The Index Page
The index page is the default starting point for the dashboard. It hosts an Iframe which in turn embeds the ‘status.php’ page.
See below:
<h2>Instance Status</h2>
<p>Results:</p>

<iframe name="frm" id="frm" src="./status.php" frameborder="1" allowfullscreen style="width:100%;height:150px;">
The Config Page
This config page includes the following configuration items:
$awsSdkPath – sets the path of the AWS SDK and specifies the AWS auto-loader. Specify the include path as is relevant in your environment.
$awsRegion – set the AWS region that your code wants to access. I used ap-southeast-2, but you should update this to the same R
$awsSdkVersion – we the ‘2016-11-15’ version of the API.
$apiKey & $apiSecret – change these values! Use the AWS API key and secret that you create in step 2.
$instanceIds – change these values! You must specify the AWS instance Ids, provide by AWS in the EC2 management console.
$statusRefreshInSeconds – set the refresh rate of the status page.
See below:
$apiKey = 'AKIAIWXCMV#XAWT3NMJQ'; //REPLACE WITH YOUR KEY
$apiSecret = 'nj1NceUfwgDShuEpodj22+85h/UvLyFXH2'; //REPLACE WITH YOUR SECRET

//instance ID within EC2
$instanceIds = array(
     'i-0c8389931ec0', //instance 1 - ADD YOUR INSTANCE ID
     'i-0c64a05a9508' //instance 2 - ADD YOUR INSTANCE ID
);

//status refresh of page
$statusRefreshInSeconds = 15;

...
Status Page
The status page does the actual PHP API magic and integrates with the AWS API. The process is quite simple. You must first set up a client connection to AWS. Next, you request/provide information via the client connection. Finally, you interrogate the information provided by the client connection.
Let us look at the code in more detail below:
For step 1 – Setup the client connection with AWS:
//configure the AWS API client
 $client = new Aws\Ec2\Ec2Client([
     'region' => $awsRegion,
     'version' => $awsSdkVersion,
     'credentials' => [
         'key' => $apiKey,
         'secret' => $apiSecret,
     ],
]);
For step 2 – Make our request to describe the AWS instances:
$result = $client->describeInstances([
'DryRun' => false, //confirm you have the required permissions
'IncludeAllInstances' => true, //includes all running instances
'InstanceIds' => $instanceIds //the instance id's you own
]);
Lastly, interrogate the response from the ‘describeInstances’ AWS API:
$reservations = $result['Reservations'];The result returns an array of ‘reservations’. (Refer to the AWS SDK manual to see the response of the API: describe instances.) The ‘reservations’ contain an array of instances that we should interrogate. We will require a few ‘for each’ loops to display the response nicely.
The code looks something like this:
...
foreach ($reservations as $reservation) {
     $instances = $reservation['Instances'];
     foreach ($instances as $instance) {
          ...
          echo 'Instance Name: ' . $instanceName;
          ...
      }
     ...
}
And, you are done!
Wrapping up
Setting a secure AWS API policy is easy. Using PHP to interact with your instances is easy too.
Click here to view a demo of this Dashboard.
You can download the source code here…


I read your post and I enjoyed it. I think that everyone would enjoy reading this blog and I believe it’s important to share this blog with the public.