On December 6, 2016, the WordPress team announced the JSON REST API. The original API came with an endpoint for posts, comments, terms, users, meta, and settings. By now, the REST API includes much more functionality like plugins access, custom post and taxonomy types, authorization, and searches. In this post, you will be learning how the posts endpoint works and how you can use that to edit WordPress custom fields. But first, let us start with the basics of using the REST API in WordPress.

Table of Contents
WordPress REST API
The API can be accessed through a get request to /wp-json/ (example: www.example.com/wp-json/). This endpoint lists basic information about the site, like site URL, site name, and description. The namespaces portion shows which namespaces are available. This can be useful, especially when working with plugins and themes.
The most interesting part lies in routes, specifically in /wp/v2/ namespace. Routes list all the possible endpoints for any request. There are many endpoints for different functionalities such as posts, settings, pages, terms, comments, etc. This post focuses on the /posts/endpoint. Before you can start manipulating data, let’s quickly look into how GET and POST requests work.

The GET Request
You use GET requests to retrieve data, such as search results. GET requests are not very secure. Therefore, you can use only it for non-sensitive data. In WordPress, you can use this request to retrieve posts, pages, links, comments. You can also retrieve other data that is public and does not require authorization. A good example is to search and retrieve post data via ID. Simply go to: /wp-json/wp/v2/posts/1 from your browser. The result may look quite jumbled up at first.
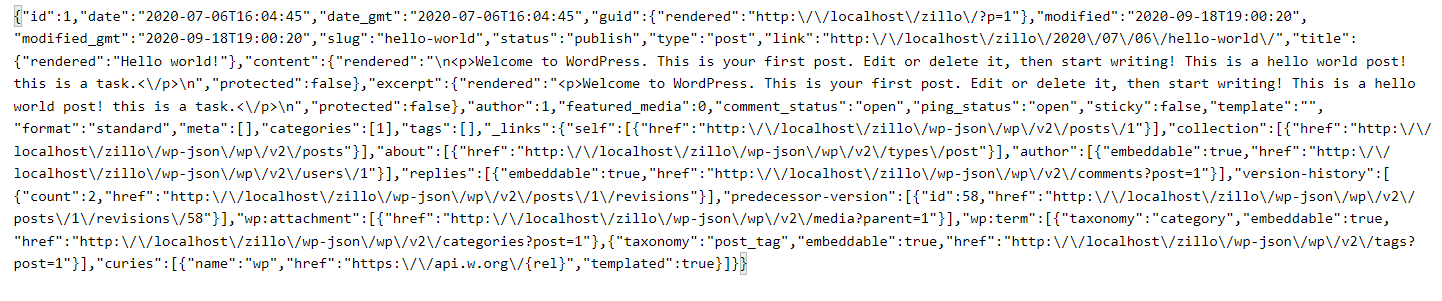
This is the post in JSON format. It might not be very user-friendly, but it is very machine-friendly. You can view a formatted version of JSON as well, e.g., using an online JSON viewer. A good choice is using the postman app. Postman is excellent for debugging REST API requests. A formatted JSON looks like this:

Notice how this API results in the same data as you would see on a website. But this data is in JSON format.
The POST request
You can use POST requests when you process sensitive data, such as usernames and passwords. You also use the POST method for authorization purposes. For this post, we will use a basic authorization plugin for development purposes. Once installed, you can look send a basic post request to the same address using postman. From the postman app, use POST as the method and enter your username and password as shown.
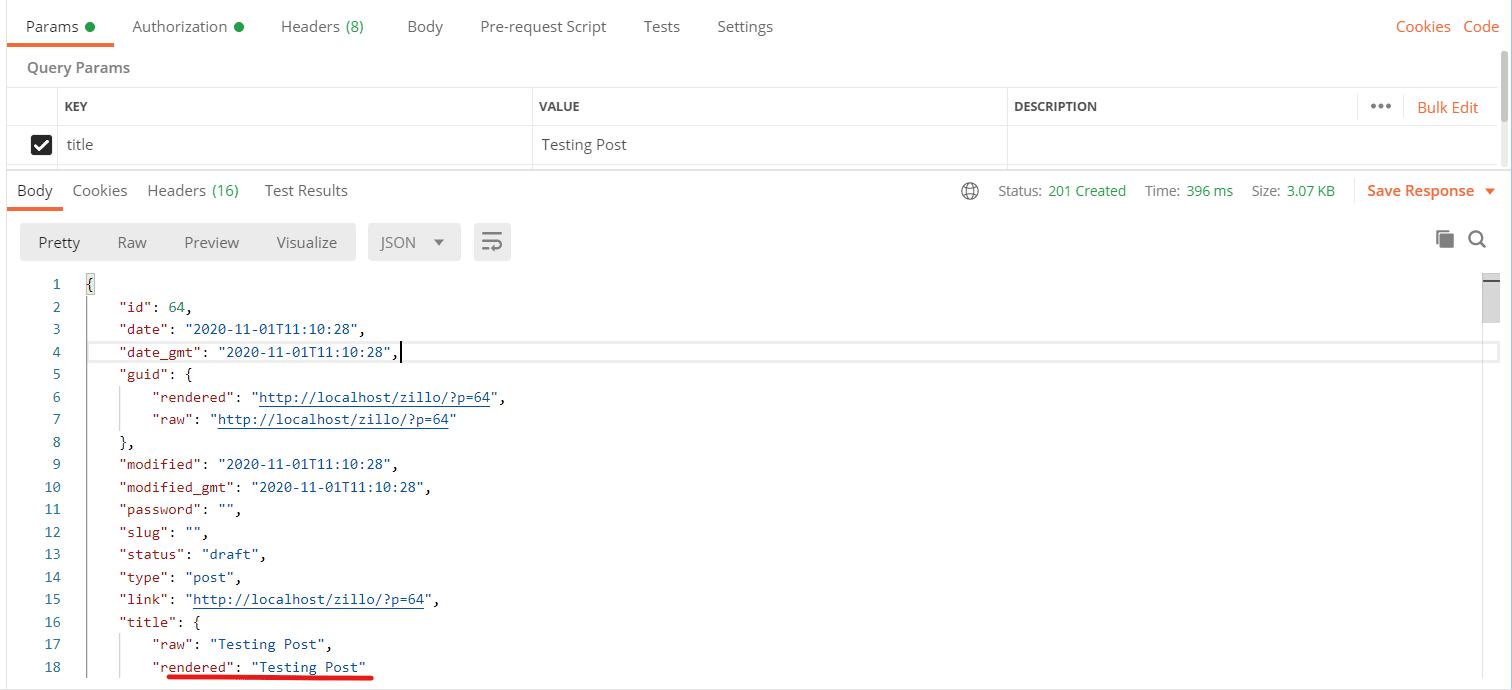
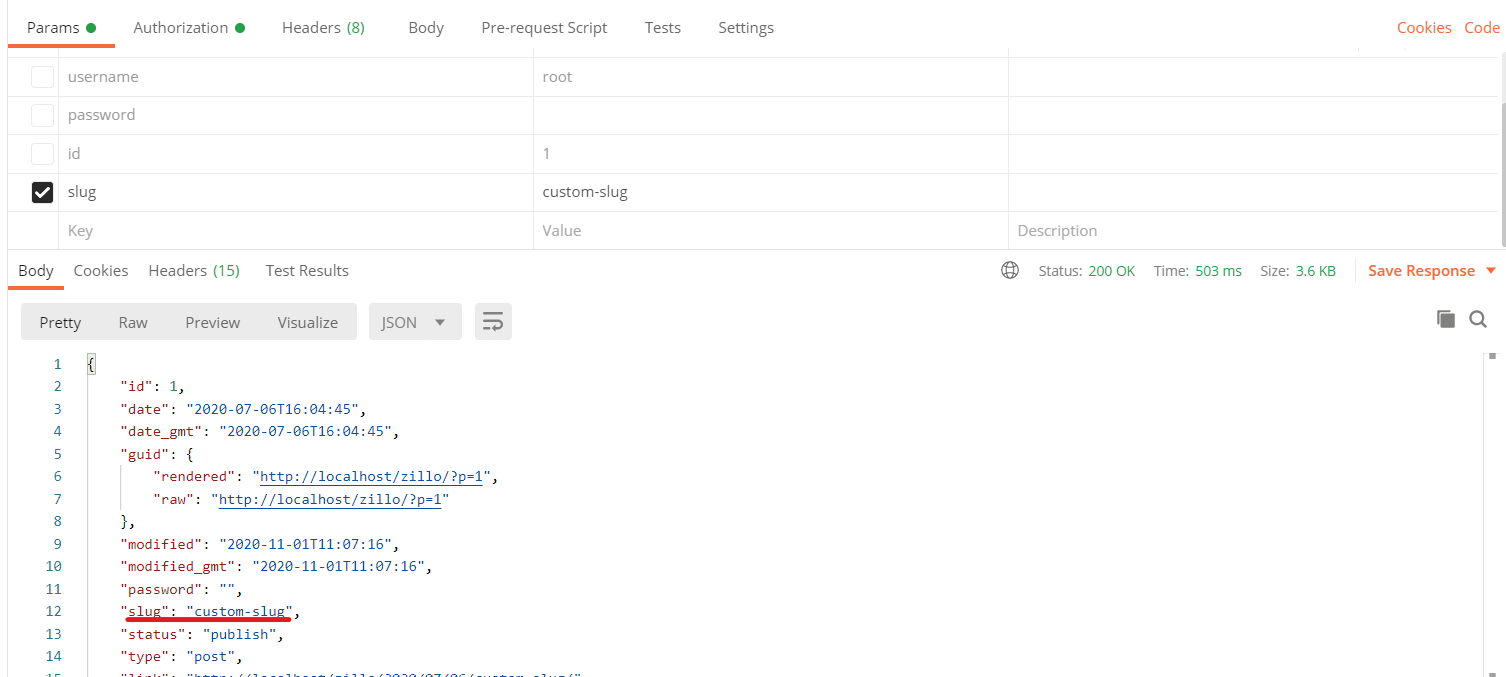
You can also send a request to /wp-json/wp/v2/posts/1 with your post details, which will update the post.
See the modified slug below:
Alternatively, sending a request to /wp-json/wp/v2/posts/ will add a new post.

Updating Custom Fields
Now that you have a good idea of the basics of WordPress REST API, you can learn how to update custom fields. By default, a REST API request can edit only specific fields as mentioned in the Posts Endpoint reference. For this purpose, WordPress offers the register_api_field() function. This function is hooked to rest_api_init action. The functions take 3 arguments, object_type, attribute, and the arguments.
register_rest_field( string|array $object_type,
                        string $attribute,
                        array $args = array() )
The first argument defines the object type, e.g. “post”, “term”, “comment” etc. The second argument is the attribute you wish to modify. In other words, it is also the name of the custom field you want to add. The third argument is an array of arguments defining how the field is handled.
Let’s suppose you are working on a book review website. You have a custom field “author_name” in your post. You can use the following code for this purpose:
function add_author_name() {
    register_api_field('post',
        'author_name',
        array(
            'get_callback' => 'rest_get_author_name',
            'update_callback' => 'rest_update_author_name',
            'schema' => array(
                                'description' => 'The name of the book author.',
                                'type' => 'string',
                                'context' => array('view', 'edit')
                            )
        )
    );
}

add_action('rest_api_init', 'add_author_name');

function rest_get_author_name($post, $field_name, $request) {
  // Make modifications to field name if required.
  return get_post_meta($post->id, $field_name);
}

function rest_update_author_name($value, $post, $field_name) {
  // Perform Validation of input
  if (!$value || !is_string($value)) {
    return;
  }
  // Update the field
  return update_post_meta($post->ID, $field_name, $value);
}


/* Optional code. May be required if custom field is not defined already. */

$args = array(
    'type'=>'string',
    'single'=>true,
    'show_in_rest'=>true
);
register_post_meta('post', 'author_name', $args);
Let’s break down the code. While calling register_api_field, the first argument is the type of object, i.e., post. The second one is the field name, i.e., author_name. Finally, the third argument is where we define functionality.
get_callback is the name of the function to be called when a GET request is sent. This function will receive up to four arguments, first is the current post object. The second is the field name being called—the third argument full request payload as a WP_REST_Request object. An optional fourth parameter contains the object type being called for. Here the function is rest_get_author_name.
update_callback is the function’s name to be called when a POST request is sent with modification details. This function accepts three arguments. First is the new value to set. The second is the post object. The third argument is the field name. In this case the function is rest_update_author_name.
In some cases, when the custom field is not already registered, you might need to register it yourself. If this is the case, then you can use register_post_meta to define the custom field.
Wrapping up
Hopefully, you now understand how to work with WordPress custom fields and REST API.


I appreciate you penning this write-up and the rest of the website is very good.
Thanks for ones marvelous posting! I really enjoyed reading it, you may be a great author.