Linux offers SSH directly via the Bash interface, and now you can do the same for Windows 10! Why do this? Putty makes it hard to initiate new server connections via the CLI and thus limits automation capability. Having SSH installed on Windows makes this task super straightforward. This post will show you how to install and use the Windows 10 SSH feature.

How to install the Windows 10 SSH feature
You can install the SSH feature using the Optional Features in Windows Settings or Windows PowerShell. However, either of these options will require elevated Administrator permissions.
To install SSH: click on Start -> Settings Apps -> Apps and Features -> Manage Optional Features. Next, find “OpenSSH Client” and then click “Install“.
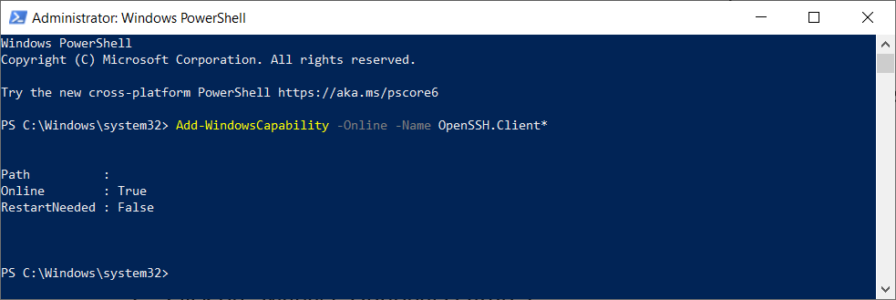
Alternatively, you can run the following command via PowerShell to install SSH:
Add-WindowsCapability -Online -Name OpenSSH.Client*See the following example screenshot:
How to use the Windows 10 SSH feature
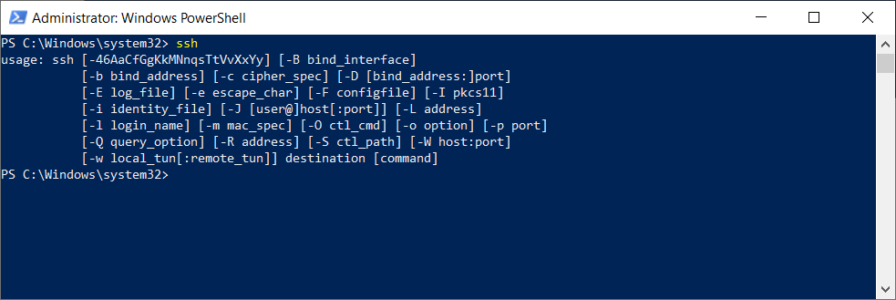
Run the ssh command to see all the parameters that you can run.
Additionally, you should now be able to run a basic SSH command such as:
ssh username@servernameThe first connection to a server will result in a message like the following:
The authenticity of host 'server name (<the server ip>)' can't be established.
ECDSA key fingerprint is SHA256:(<a large string>).
Are you sure you want to continue connecting (yes/no)?
Answer “yes” so that SSH will add the server to the local system’s list of known SSH hosts.
Of course, most of you may be using private key files instead of passwords. The easiest way to do this is by storing your private key file in the .ssh folder of your user profile.
You can then connect to your server using the following example command:
PS C:\Users\user> ssh -i ./.ssh/myPrivateKey.pem [email protected] -p 22Remember to run PowerShell as your local Windows user for the example mentioned above.
Consequently, you will also have access to the following SSH commands from your Windows command prompt or PowerShell: ssh.exe, scp.exe, sftp.exe, ssh-add.exe, ssh-agent.exe, ssh-keygen.exe, and ssh-keyscan.exe.
Wrapping up
Now you know how to install and use the Windows 10 SSH feature! Tell Anto Online if you prefer using Putty or how it stacks up with Linux’s SSH client. You may also be interested to see “How to setup Windows Subsystem for Linux“.
Sources
You may also want to visit the following excellent sources for more in-depth information:
- Installation of OpenSSH For Windows Server 2019 and Windows 10 – microsoft.com
- Install OpenSSH on Windows 10 using PowerShell – jcutrer.com
- Install SSH on Windows 10 as Optional Feature – www.thomasmaurer.ch
- PowerShell remoting with SSH public key authentication – 4sysops.com
- Secure Shell – wikipedia.org