Jenkins is an open-source automation server that enables developers to build, test, and deploy software. Additionally, you can install it on various operating systems such as Linux, Windows, macOS, etc. This guide will show you the various options to set up and install Jenkins.

Table of Contents
Prerequisites for installing Jenkins
You need to ensure that your system supports Java 8 or Java 11. However, sizing a Jenkins environment depends on several factors. Generally, Jenkins requires a minimum of 200MB of RAM, but this depends on the size of the builds. Also, most modem browsers are supported. The browsers include Google Chrome, Mozilla Firefox, Microsoft Internet Explorer, Apple Safari.
You can read the following guide from Jenkins to estimate your correct sizing.
Jenkins installation options
You have many options to install Jenkins. These include running Jenkins as a:
- Standalone WAR
- Containers (Docker, Kubernetes, etc.)
- Package (DEB, RPM, etc.) installer
- Windows installer
This guide will discuss the summarized install for the:
- Standalone WAR
- Docker container
- Debian package
Standalone WAR
Follow these instructions to run Jenkins as a standalone WAR:
First, download the Jenkins WAR file from the Jenkins project page.
Then, next, launch a terminal window, and run the following command:
java -jar jenkins.warFinally, browse to http://localhost:8080 and wait for Jenkins to load
Containers
Follow these instructions to run Jenkins as a Docker Container:
First, create a Docker network for Jenkins:
sudo docker network create jenkinsThen, next, download and run Jenkins:
sudo docker run --name jenkins --rm --detach --privileged --network jenkins --network-alias docker -p 8080:8080 -p 50000:50000 -v /var/jenkins_home jenkins/jenkins:ltsFinally, browse to http://localhost:8080 and wait for Jenkins to load.
Package installer
First, follow these instructions to run the Debian/Ubuntu package installer:
wget -q -O - https://pkg.jenkins.io/debian-stable/jenkins.io.key | sudo apt-key add -
sudo sh -c 'echo deb https://pkg.jenkins.io/debian-stable binary/ > /etc/apt/sources.list.d/jenkins.list'
sudo apt-get update
sudo apt-get install jenkins
Then, next, register the Jenkins service:
sudo systemctl daemon-reloadThen, finally, start the Jenkins service:
sudo systemctl start jenkinsSnap installer
You can also use Snap to install Jenkins using the following command:
sudo snap install jenkins --classicFinally, browse to http://localhost:8080 and wait for Jenkins to load.
Jenkins post installation setup
The post-installation setup begins when you launch a newly installed Jenkins instance.
The Jenkins setup takes you through the steps to:
- unlock Jenkins
- customize it with plugins
- create the first administrator user
Unlock Jenkins
First, you need to provide the automatically-generated password. This password is provided to you during the install.

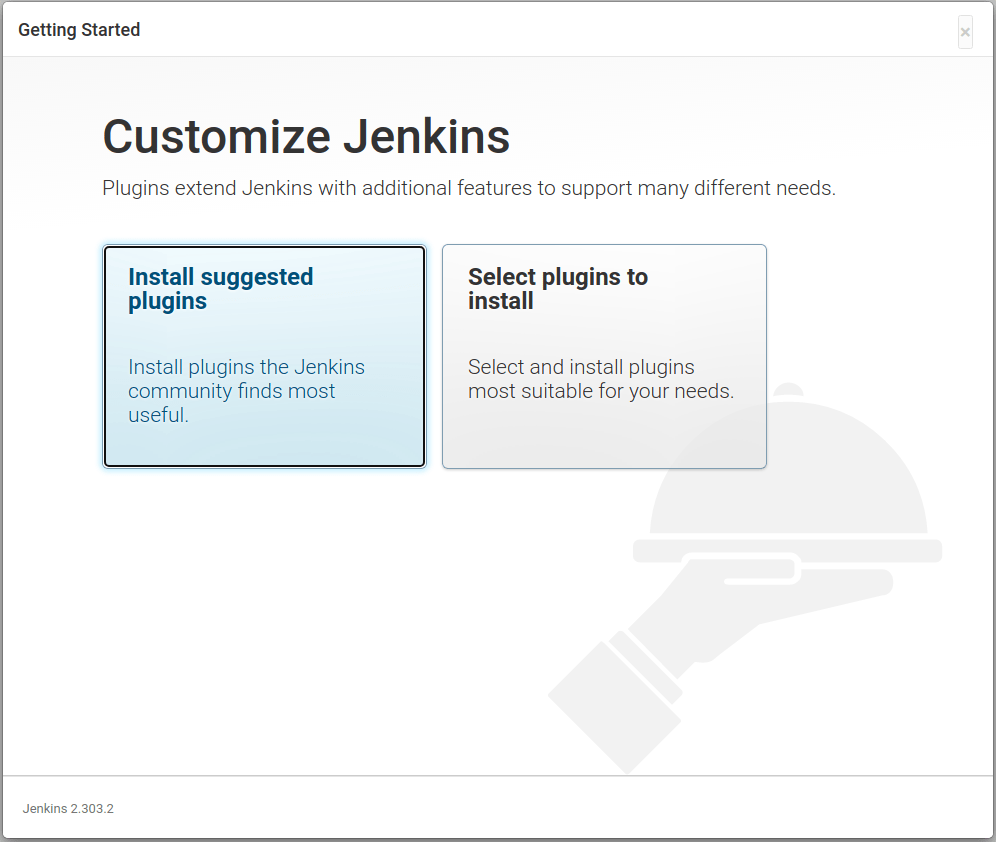
Customizing plugins
Then, next, Jenkins requires plugins to function. We, thus, recommend that you install the suggested set of plugins based on the most common use cases. Consequently, this option will quickly get you started with Jenkins.
Creating the first administrator user
Finally, Jenkins will let you create your first administrator user. Here you will need to specify the details for your administrator user in the respective fields.
Adding additional nodes
As you might imagine, the main Jenkins instance can get quite busy as it serves the Jenkins users. Therefore, you can add new build nodes to help run the various jobs. Jenkins uses port 50000 to communicate the build nodes. You can add the new nodes manually or use the Swarm plugin to provision agents automatically.
Wrapping up the set up and install of Jenkins
You have now set up and installed Jenkins as your automation server. All you need to do now is set up your first build pipeline. After that, Jenkins makes it easy for developers to build, test, and deploy software.